
You need administrator rights in Jira to perform the tasks on this page.
Before you can use the Checklist Proxy for Customer Portal custom field, it needs to be added as a field for the desired request type(s).
To do so:
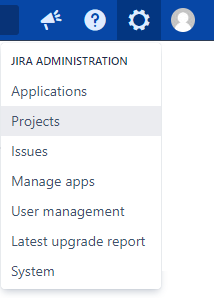
-
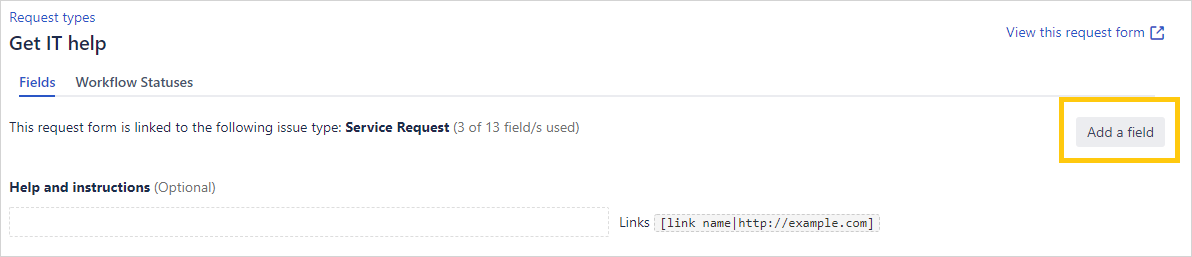
Go to Administration > Projects.
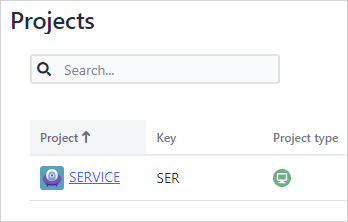
-
Select the Jira Service Management project that you want to configure.
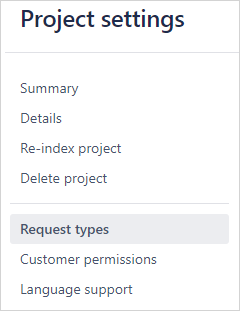
-
In the sidebar, click Request types.
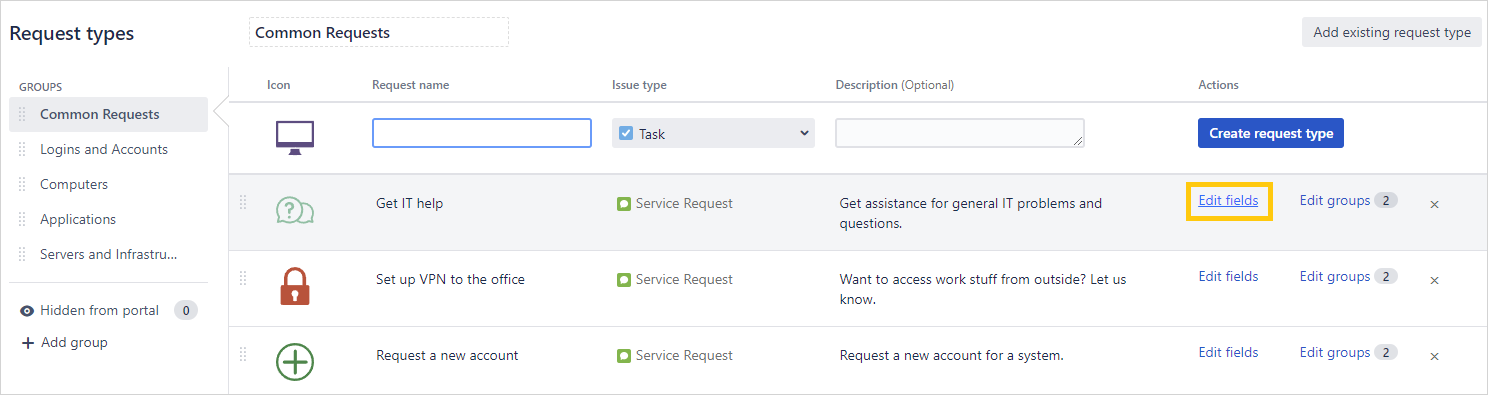
-
In the row for your desired request type, click Edit fields.
-
On the top right, click Add a field.
-
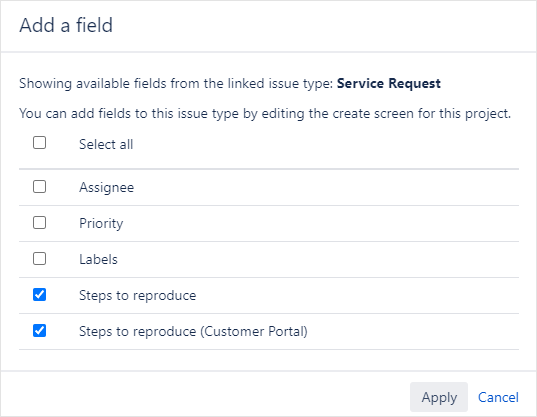
Select both Checklist custom field and Checklist Proxy for Customer Portal custom field, then click Apply.
-
(Optional) You can change the name the proxy field will have on the portal page.


That’s it! Your field will now be available on the customer portal when someone creates a request of this type. You can repeat this for all the request types you need.