
Checklists are implemented as item views on monday.com.
To create a checklist item view, follow these three (3) steps.
You can create multiple checklist views - simply repeat this procedure as many times as you need.
Step 1: Add a Checklist for monday item view
To add a new Checklist for monday view to a board:
-
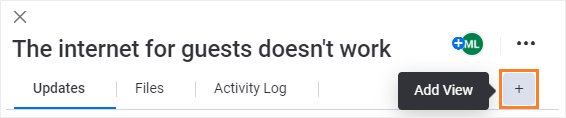
From a monday.com board page, open any item page.
-
In the header of the item page, select the + button to add a new view.
-
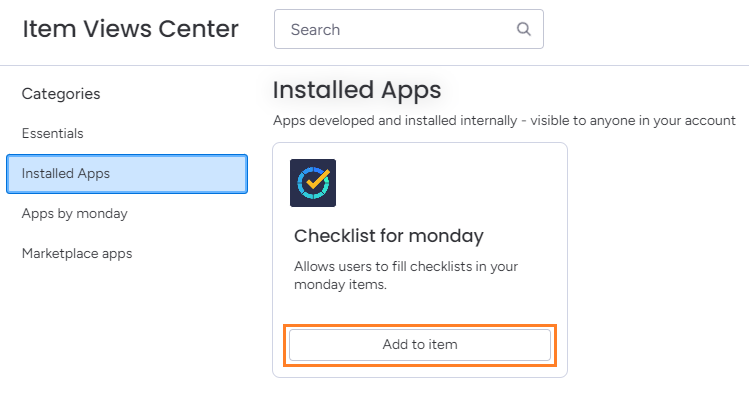
Find the Checklist for monday view, then select Add to item.
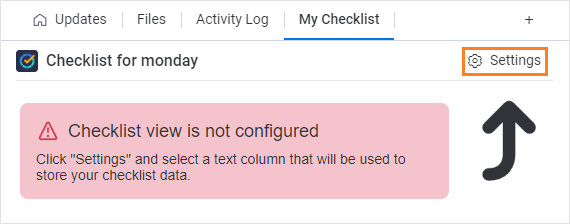
You’ve now added a Checklist for monday view to all items on this board. Before it can be used, you need to configure it.
Step 2: Configure a Checklist for monday item view
Checklist for monday requires a text column to store its data. This is called the Data Column. Later, we’ll hide the Data Column from users.
Optionally, Checklist for monday can output current checklist progress (as a percentage) to a numbers column. This is called the Progress Column.
Not sure what text and numbers columns are? See monday’s documentation: https://support.monday.com/hc/en-us/articles/115005310285-What-are-the-column-choices-.
To configure these columns:
-
On the checklist view tab, select Settings beside Checklist for Monday.
-
Select a text column in your table for Checklist for monday to use as a Data Column.
or
Select + Create New Column to have monday create a new text column for you. (You can later rename it from the board.)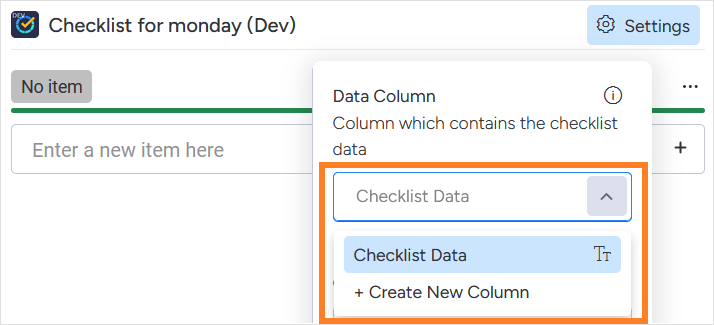
-
(Optional) Select a numbers column in your table for Checklist for monday to use as a Progress Column.
or
Select + Create New Column to have monday create a new numbers column for you. (You can later rename it from the board.)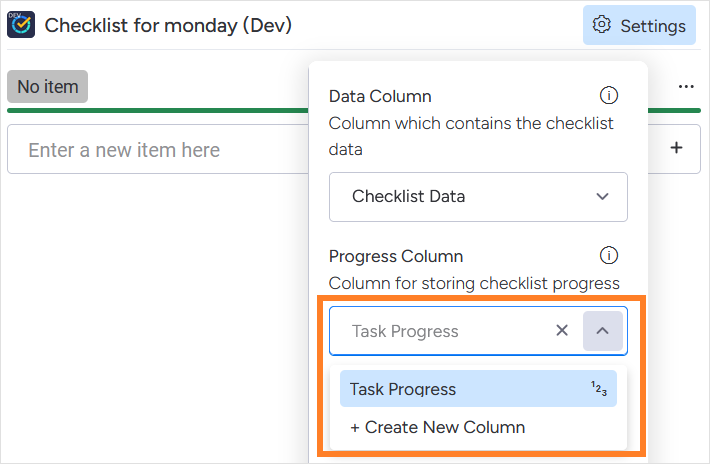
-
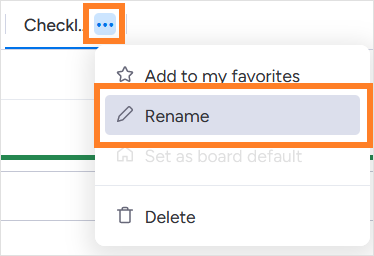
(Optional) Select the ••• button on the item view tab you created and select Rename to enter a new name for the checklist. This is useful if you have more than one checklist on a board.
The checklist is now usable, but there’s one more step.
Step 3: Hide the data column
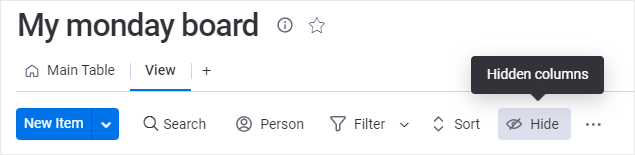
The text contained in the Data Column is in JSON format and should not be manually modified by users. Therefore it's best if the column is hidden from your board views.
To hide the Data Column from a board view:
-
Go to the board page, then select Hide in the header.
-
Clear the Data Column you assigned from the list.
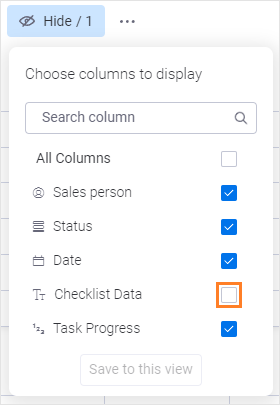
That’s it! The Data Column is hidden, and your checklist is now ready to use.
What’s next?
To learn how to use your checklist, see User guide.
To customize your checklist with automation features, see Customizing with automation recipes.