
Permission schemes are used to grant or restrict a user's ability to do certain things when interacting with checklist fields in issues.
Using a permission scheme, administrators can control who can add an item, who can remove an item, who can edit or check an item, etc.
This is a robust feature allowing a high degree of customization and control.
You need administrator rights in Jira to perform the tasks on this page.
Permission schemes only affect what users can do through the UI. Permissions schemes don’t restrict what users can do through scripting or the API.
This page describes how to create and configure permission schemes. To learn how to assign a permission scheme to your checklist custom fields, see Editing permission schemes.
Concepts
Having a general understanding of the different concepts used in the permission schemes is essential to understand how permission schemes work.
Permission schemes only apply to displayed checklists. They have no effect on automation, scripting, or post functions. Therefore, while permission schemes are an effective way to limit what users can do through the UI, they do not limit what developers can do through other means.
Centralized permission schemes let you design your permissions once and re-use them across multiple Checklist fields or configuration field contexts.
Permissions
Permissions define who can and can't perform what actions. Permissions are organized by action (or group of actions).
Permissions are built hierarchically: if no rule is defined for a certain action (or group of actions), evaluation falls back to the parent permission. For details, see Evaluating a permission.
Rules
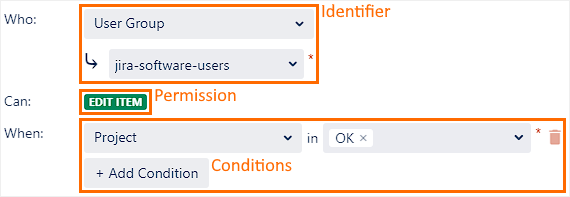
Rules are sets of identifiers and conditions that give access to specific permissions.
-
Identifier: Determines what user(s) the rule grants access to.
-
Condition(s): Determines whether this rule is to be considered in the context where the permission is being evaluated.
Due to a Jira limitation, some conditions will never match during an issue’s creation (e.g. the issue’s workflow status or workflow status category).
Evaluating a permission
The process of evaluating a checklist permission is as follows:
-
The scheme looks up that permission’s rules.
-
Rules are filtered out based on their conditions.
-
If there are no rules (after filtering): return to step 1, this time looking at the parent permission.
-
If there is a rule (or rules), the system validates if the user matches one of them. If yes, the user may take that action. If no, the user is denied access.
-
If no applicable rules are found all the way up to the All Permissions permission, the user is denied access.
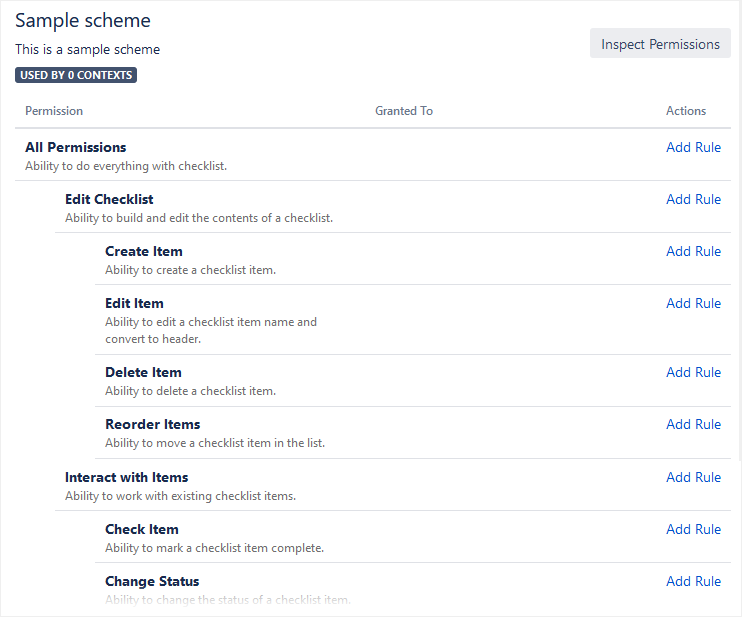
For example, consider the following permission scheme.
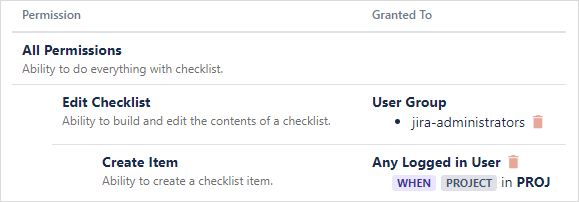
If a user tries to create an item under this permission scheme, the evaluation goes as follows:
-
The scheme looks up the rules for the Create item permission.
-
It finds a rule with a condition for project PROJ. If the checklist is in project PROJ, the rule applies, and evaluation ends here: the rule allows Any Logged in User, so access is granted.
-
If the checklist isn’t in project PROJ, the rule is filtered out. No rules remain under Create Item, so next it checks the parent permission, Edit Checklist.
-
Here it finds a rule with no condition, so the rule applies, and evaluation ends here: if the user belongs to group jira-administrators, access is granted; if not, access is denied.
To help better understand the process, you can simulate access requests using the Inspect Permissions tool. For details, see Inspect permissions.
Open the Checklist Permissions Schemes page
All tasks below (create a new permission scheme, configure an existing one, etc.) start from the Checklist Permissions Schemes page. To access it:
-
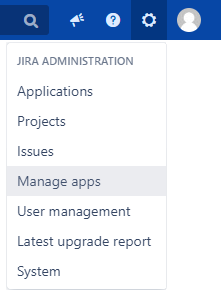
Go to Administration > Manage apps.
-
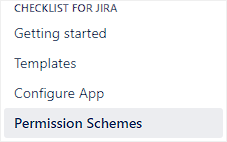
In the sidebar, go to Checklist for Jira > Permission Schemes.
The following page will appear:

Create a permission scheme
There are two ways to add a new permission scheme:
-
Create a blank permission scheme: Click Add Permission Scheme, then enter a name and click Save.

If you assign a blank permission scheme to a checklist custom field, nobody will be able to do anything! Remember to configure your new scheme by adding permission rules.
-
Copying an existing permission scheme: Click Copy beside the scheme you want to copy.

Configure a permission scheme
If you encounter unexpected behaviour: make sure you understand how the rule hierarchy works (see Evaluating a permission).
The Inspect Permissions tool can help you test your permission scheme. For details, see Inspect permissions.
To configure a permission scheme, click the scheme’s name or click Permissions beside that scheme.

The list of permissions opens. This list is hierarchical: child permissions are indented under their parent permissions. If no permission rule is assigned to an action, that action will inherit the rule from its parent (or grandparent).
If you assign a blank permission scheme (like below) to a checklist custom field, nobody will be able to do anything! Remember to configure your new scheme by adding permission rules.
Add permission rules
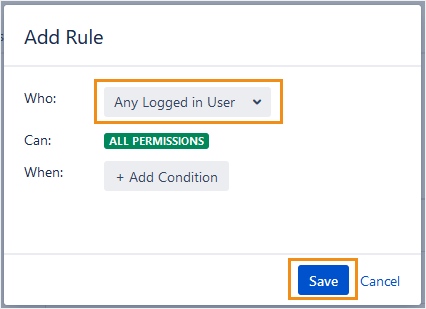
To add a rule governing an action:
-
Click Add Rule beside that action.
-
Define Who can take that action.
-
(Optional) Define When that action can be taken by adding one or more conditions.
-
Click Save.
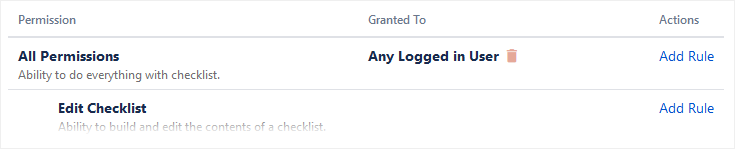
For example, let’s define a rule that allows any logged-in user to do anything at the top level of the hierarchy.
Defining an Any logged in User rule at the All Permissions level lets any user do anything, unless restricted by a rule. Whereas when no rule is defined for All Permissions, no users can do anything, unless allowed by a rule.

Many kinds of rules are possible by choosing Who the rule applies to and When the action can be taken.
The options for Who can do the action are as follows:
-
Any Logged in User
-
User Group: Enter or choose a user group from the dropdown that appears.
-
Project Role: Enter or choose a role from the dropdown that appears.
-
Issue Reporter
-
Issue Assignee
-
Single User: Enter or choose a user from the dropdown that appears.
-
Checklist Item Assignee
The Checklist Item Assignee option is only available for permissions within the Interact with Items permission.
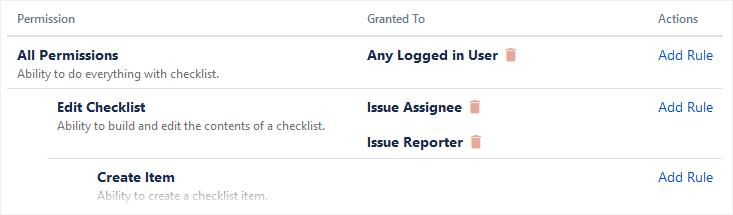
Multiple rules can be combined on a single action. For example, here’s two rules that allow both the Issue Reporter and Issue Assignee to edit checklists:
The conditions for When an action can be taken are as follows:
-
Project
-
Issue type
-
Workflow Status
-
Workflow Status Category
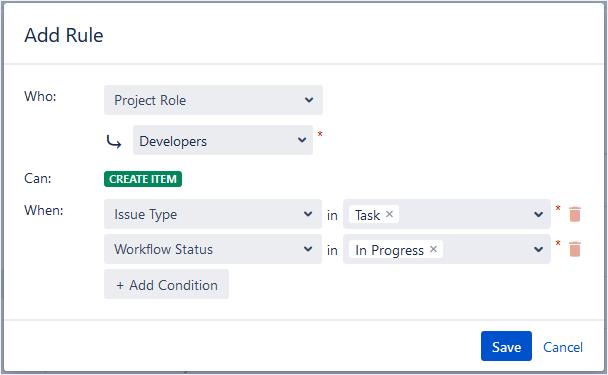
Multiple conditions can be added to a single rule. For example, here’s a rule that specifies Developers can create items only for Tasks that are In Progress:

Rules can’t be edited. To change a rule, delete it and create a new one.

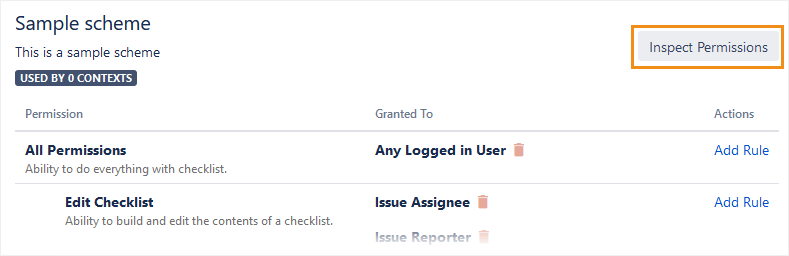
Inspect permissions
To test if your permission scheme will work as intended, click Inspect Permissions.
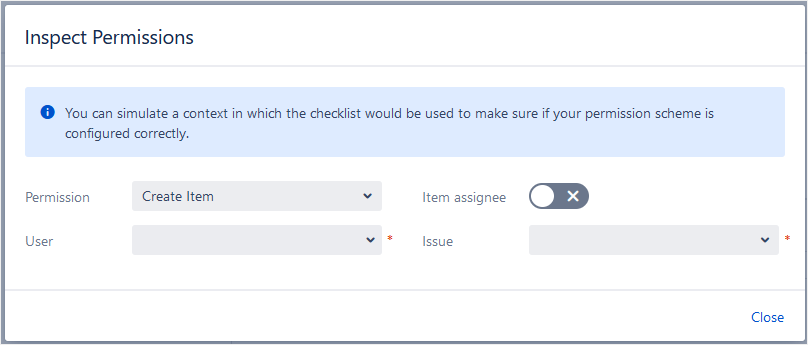
In the window that opens, choose a specific Permission, a User, and an Issue. The tool then says whether that user has permission to take that action, and visually shows you the evaluation logic.
For example, let’s use the Inspect Permissions tool to evaluate the permission scheme created in the examples above. Let’s check if user Okapya Administrator can Edit Item in issue DOC-2:

There's no rule defined for Edit Item, therefore evaluation moves to the next level in the hierarchy. The parent level is Edit Checklist, which does have a rule defined: only the Issue Reporter or Issue Assignee. Since Okapya Administrator is the Issue Reporter for DOC-2, this user can take this action.
Let’s look at another example by changing the Issue to DOC-3:
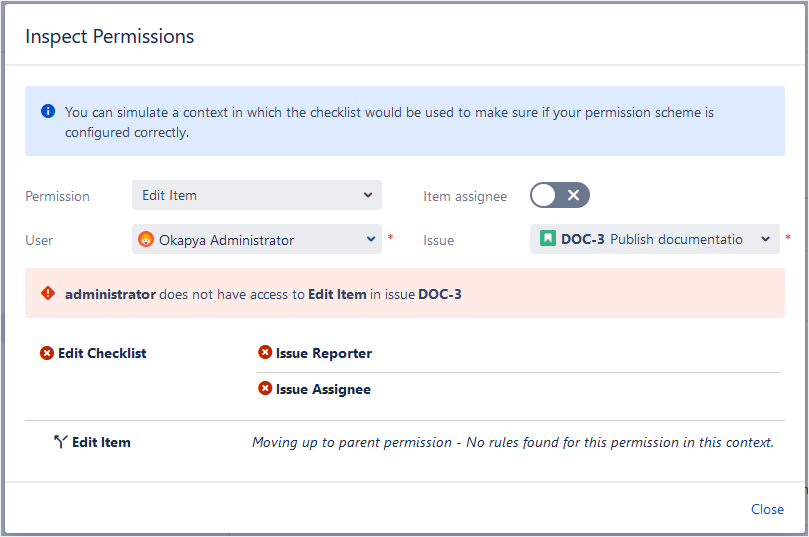
This time, since Okapya Administrator isn't the Issue Reporter or Issue Assignee for DOC-3, this user can’t take this action.
When a condition filters out certain rules, those rules are shown in an expandable section.

Depending on your needs, permission schemes can get pretty complicated. The Inspect Permissions tool can help you ensure a permission scheme is working the way you intended.
View context(s)
To see what configuration field context(s) use a permission scheme, click the link under the Usage column header, named something like (n) context.

The context(s) are displayed. Clicking any of the context links will bring you to the Configure Custom Field page for that context.
If the permission has 0 contexts, you haven’t yet added the permission scheme to any context. For details on how to do this, see Editing permission schemes.
Rename a permission scheme
To change a permission scheme’s name or description, click Edit beside that scheme. Enter the new name or description, then click Save.

Delete a permission scheme
To delete a permission scheme, click Delete beside that scheme.
