Action - Add Checklist items
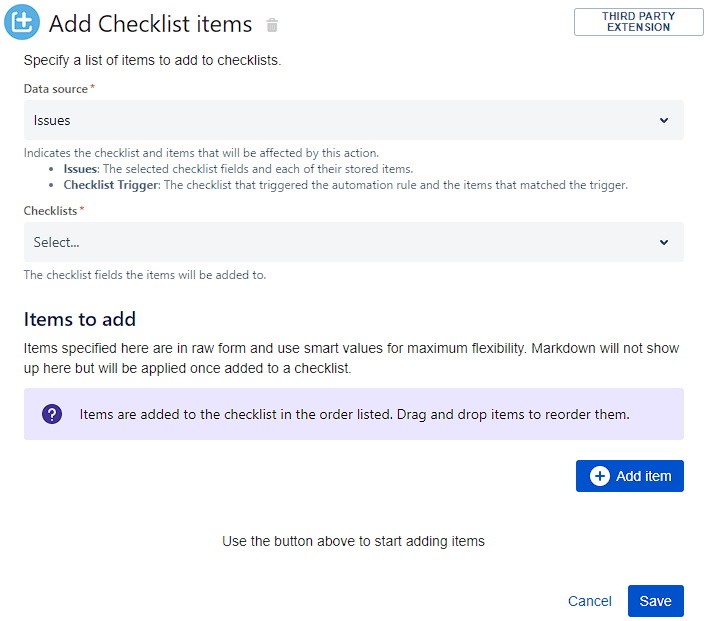
The Add Checklist items action allows you to add one or more items to one or more existing checklists.
Configuration

The action’s fields are as follows:
Field | Description |
|---|---|
SINCE V7.0.4 Data source | Indicates the checklist and items that will be affected by this action.
|
Checklists | The checklist or checklists that the items will be added to. |
Items to add | The list of items to be added to the checklist(s). Use the + Add Item button to start adding items. Items are added to the checklist in the order listed. Drag and drop items to reorder them. |
Add item
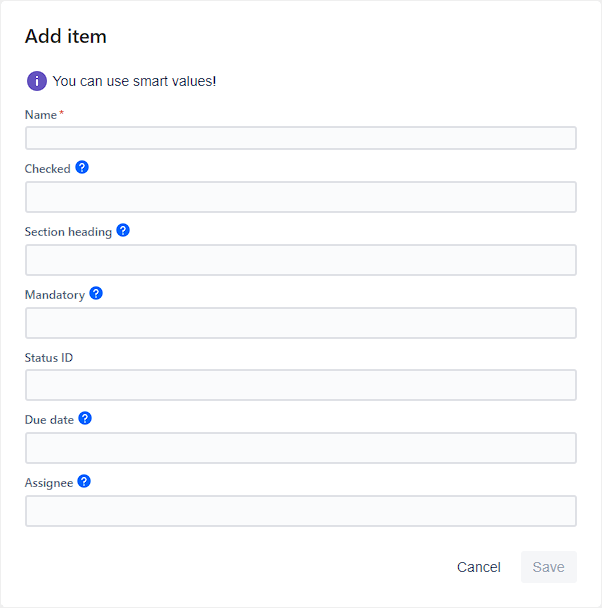
When you click the + Add Item button, the following form appears:

All fields are text-based, allowing the use of Automation's smart values. To learn how to use smart values, see Atlassian's documentation.
The fields are as follows. Only the Name field is mandatory:
Field | Description |
|---|---|
Name | Enter a name for the item, including description and Markdown. |
Checked | To check the item, enter |
Section heading | To make the item a section heading, enter Section headings ignore the value in the Checked field. |
Mandatory | To make the item mandatory, enter If this field is left blank, the item will behave according to the checklist’s Default Mandatory State parameter. For more information, see Editing parameters. |
Status ID | To set the item to a certain status, enter that status’s status ID. (If no status is found with that ID, the item’s status is removed.) See Editing statuses for more information on statuses and where to find their ID. |
Due date | Enter a due date for the item. The date must follow ISO-8601 format. Here are some examples of working values, including smart values:
Most non-working values will be ignored (the item will have no date), but some numeric values may result in an INVALID DATE value instead. |
Assignee | Enter a valid username to assign that user to the item. (If the user cannot be set or isn’t found, the assignee is removed.) To get a user’s name, you can use smart values such as Only users that can be assigned to the issue can be assigned to items. |
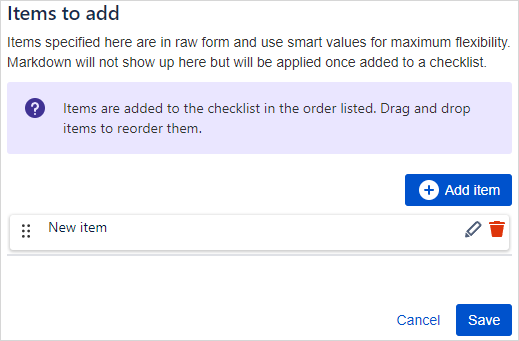
When finished, click Save. The item appears in the Items to add section.

To add another item, click + Add Item again.

To edit or delete an item, click the desired button to the right of that item.

Items are added to the checklist in the order listed. Drag and drop items to reorder them.
When finished, click Save.
