
You need administrator rights in Jira to perform the tasks on this page.
Once you have gone to the Custom fields page (see Configuring the Checklist custom field), click Edit Statuses to configure the statuses that can be assigned to checklist items:

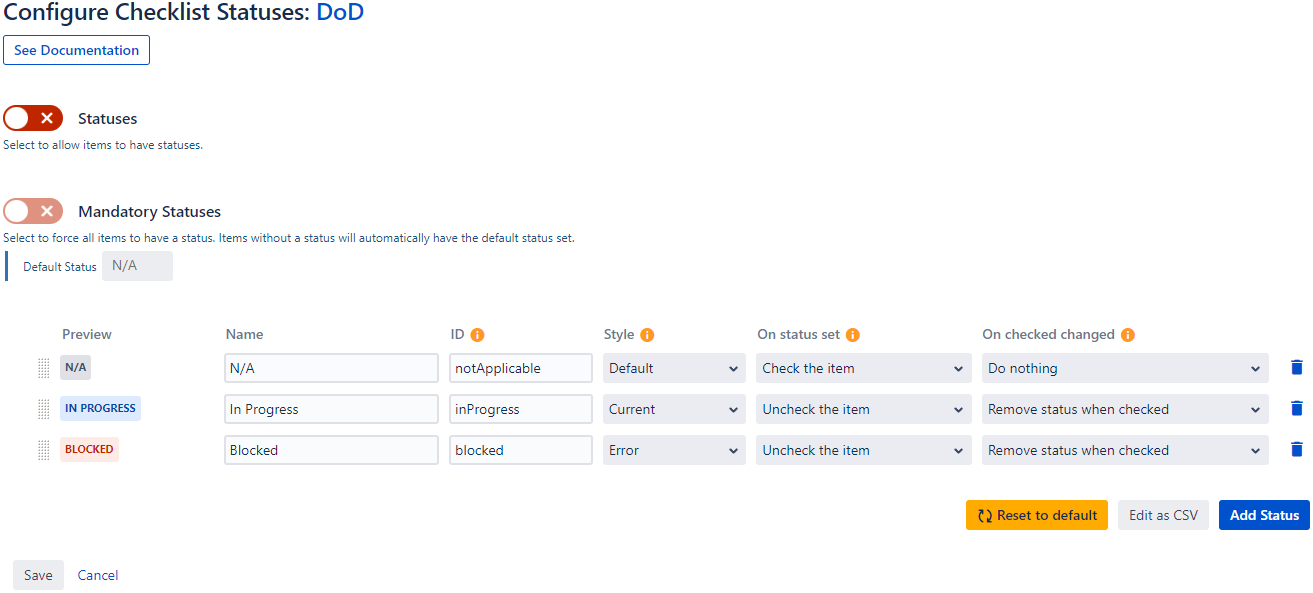
The following page will appear:
Statuses are added to checklist items for information purposes, as they are an easy way to track the progress of tasks within a project.
Enabling statuses
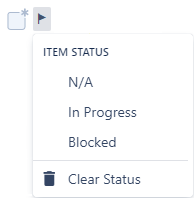
By toggling the Statuses feature, users can assign statuses to checklist items. The default statuses are N/A, In Progress, and Blocked; you can also create custom statuses.
For more information on status assignment, see Assigning statuses to items.
Making statuses mandatory
Statuses can be made mandatory on checklist items by enabling the Mandatory Statuses feature. Once done, you will be required to provide a default status, which will automatically be set to all checklist items without a status.
Once enabled, users will lose the ability to remove statuses from items.
For more information on status assignment, see Assigning statuses to items.
To make checklists controlled by statuses, see Configure a checklist to be controlled through statuses.
Creating statuses
The default N/A, In Progress, and Blocked statuses will already be displayed in the status editor, but you can also add your own custom statuses to the editor. To do so:
-
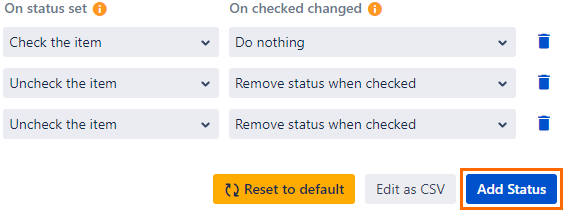
Click Add Status.
-
Referring to the table below, fill out each field and drop-down. The Preview column will automatically update with your changes.

-
Click Save.
|
Parameter |
Description |
|---|---|
|
Name |
The name that will be displayed on the status tag. |
|
ID |
Any unique ID (cannot contain spaces or be set to |
|
Style |
The appearance of the status. Styles are applied as per Jira's UI library, and the colors may change in the future if Jira updates them. Existing styles: DEFAULT , SuCCESS , ERROR , CURRENT , COMPLETE , MOVED |
|
On status set |
The behavior of an item’s checkbox when a status is set for that checklist item.
|
|
On checked changed |
The behavior of the status when an item’s checkbox is checked or unchecked.
|
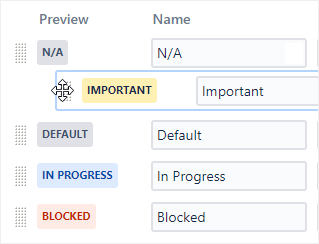
Reordering statuses
Statuses can be reordered, which changes the order in which they appear in the status drop-down.
To move the statuses into a new order:
-
Click on the handle next to a status and drag and drop it into a new location.
Deleting statuses
When you delete a status, any checklist items that previously had that status will appear to have no status when the issue is next opened.
To delete a status:
-
Click the trash icon to the right of the status.

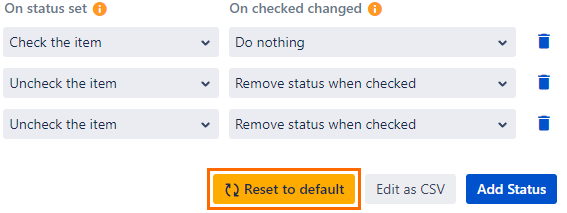
Resetting statuses to default
If you’ve made changes to the statuses and want to roll back to factory defaults, you can click the Reset to default button.
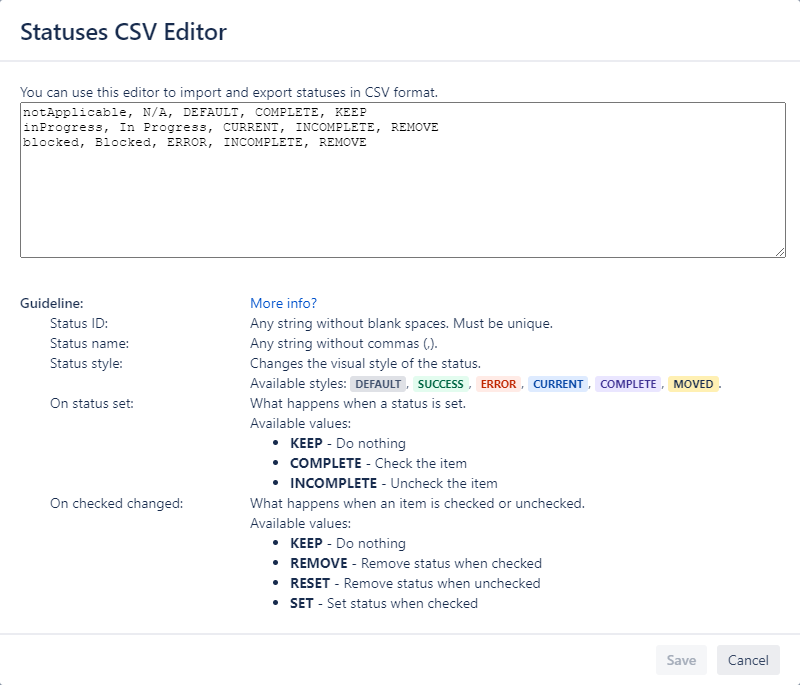
Editing statuses in CSV format
If desired, you can edit your statuses in the CSV editor instead. This makes it easy to export and import any status information that is being kept in a separate CSV file.
Each status must be on one line and have five parameters, each delimited by a comma, in the following order:
ID, Name, Style, Completion Behavior, Status Behavior
To edit statuses in the CSV editor:
-
Click Edit as CSV.
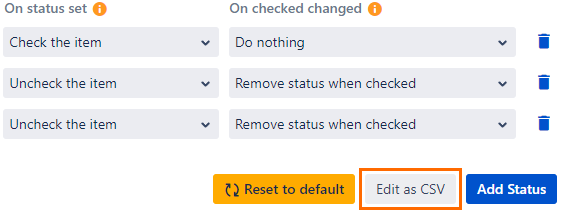
-
Add, edit or remove statuses as needed.
-
Click Save.